How to create a tilt shift blur effect in After Effects
If you’re wondering how to create tilt shift blur in After Effects then you’re not alone, it’s a lovely effect that can bring a really cool aesthetic to your projects.
In this post I’ll show you how to create a tilt shift effect manually, and then we’ll take a look at the Focal script I created for Loop which does all of the hard work for you.
How to create a tilt shift effect in After Effects manually
Step 1. Create a new Adjustment layer and place it above your footage, call this layer Blur.
Step 2. Add the Camera Lens Blur effect to the Adjustment layer
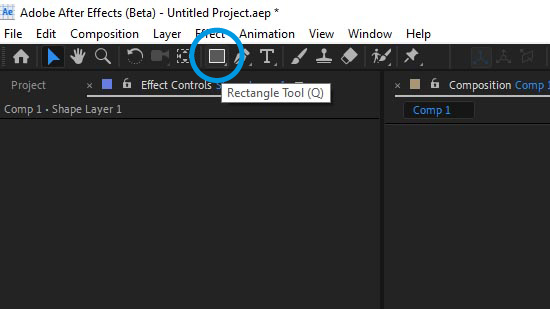
Step 3. Double-click the Rectangle tool to create a new shape layer rectangle that matches your composition size. Call this shape layer Blur Map
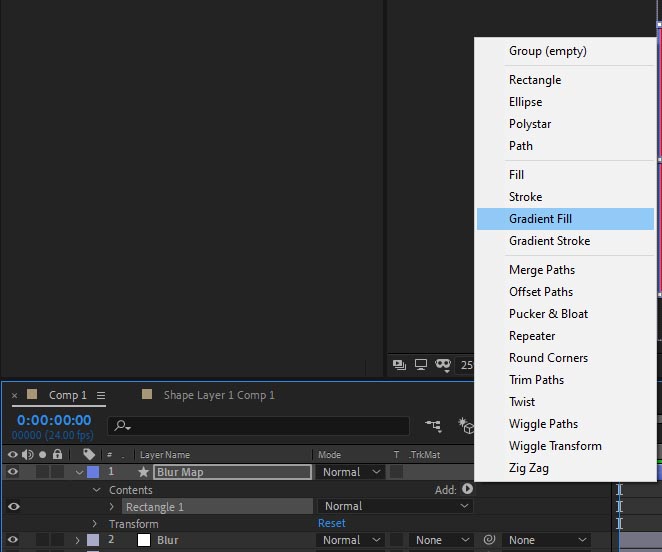
Step 4. With the shape layer selected, open up the contents of the shape layer, select the Rectangle 1 shape then click on the Add arrow, and then choose Gradient Fill
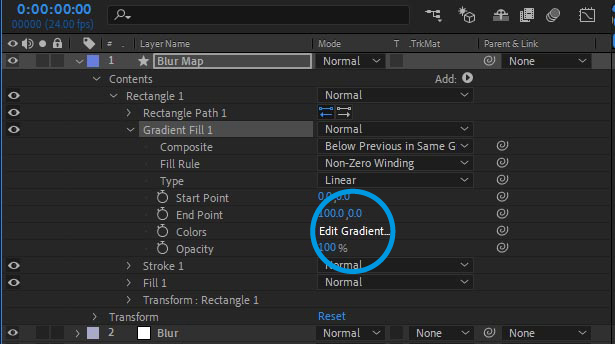
Step 5. Open up the Gradient Fill options in the shape layer and click Edit Gradient
Step 6. In the gradient editor, click in the middle just below the gradient bar to add a new stop
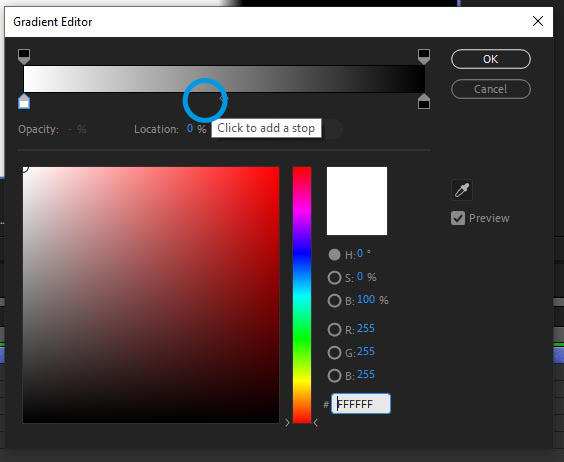
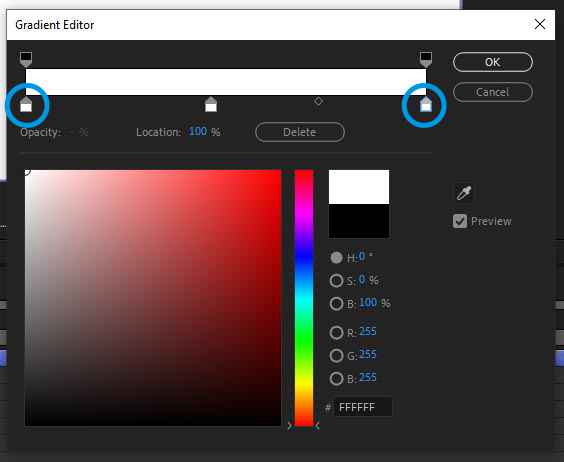
Step 7. Click on the two end colour stops and set them to white (#FFFFFF)
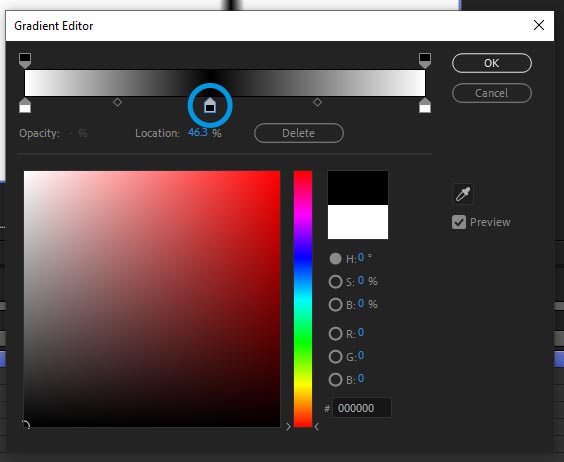
Step 8. Change the central colour stop to black (#000000)
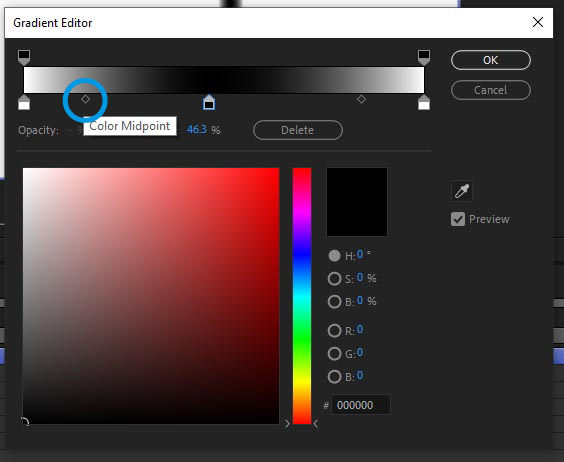
Step 9. Click on the central colour stop and drag the colour midpoint closer to the white end, do this for both midpoints (click the central colour stop again to bring up both midpoints)
Step 10. Click OK to close the gradient editor
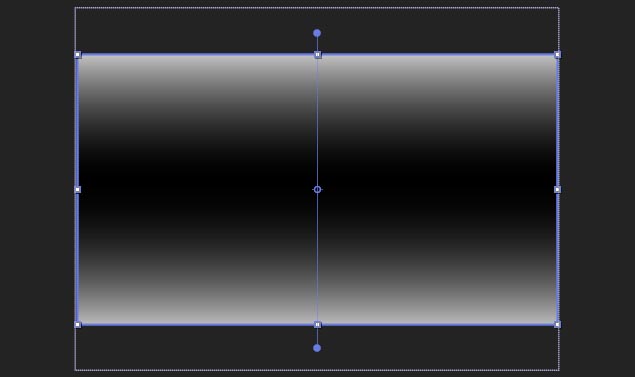
Step 11. Select the Gradient Fill option in your shape layer, then click and drag the two end points in the composition window. Place one point above your composition, and the other below your composition
Step 12. Turn your Blur Map shape layer visibility off by clicking the eye icon next to the layer.

Step 13. Click on your Adjustment Layer to bring up the Camera Lens Blur settings in the Effect Controls panel
Step 14. In the Blur Map settings, select your Blur Map shape layer in the first drop down box.
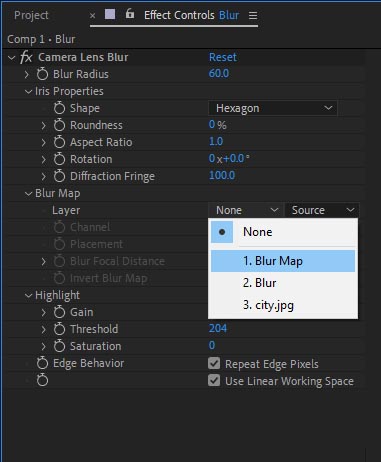
Step 15. In the Camera Lens Blur settings, turn the Blur Radius option up to around 60 and check the Repeat Edge Pixels to create a nicer look.
And that’s it!
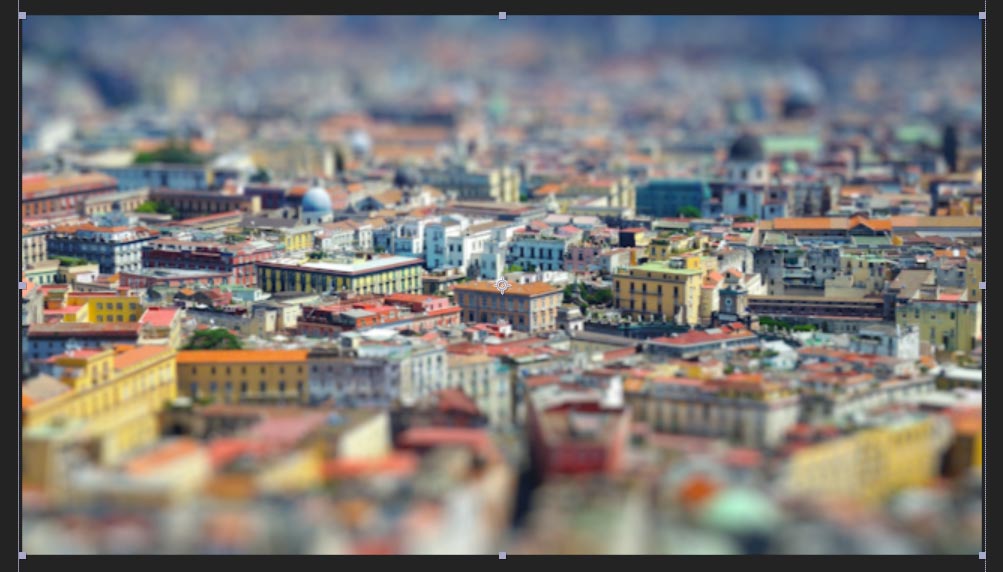
You now have your very own tilt shift blur effect right within After Effects. You can now change the position of your tilt shift blur by re-enabling the Shape layer and moving the gradient start points and end points to new locations like you did in Step 11.
Create a tilt shift blur in moments with the Focal script
Following the steps above will produce a nice tilt shift effect, however going through all those steps can be pretty time consuming… so I decided to create the Focal script to supercharge camera lens blurs in After Effects!
Instead of manually creating the blur maps and applying the camera lens blur effect, Focal takes care of everything for you. All you have to do is choose the Tilt Shift option from the drop down and hit the button.
Take a look at how it works in this quick video:
Filed under: